WooCommerce Print Invoices & Packing Lists #
The WooCommerce Print Invoices & Packing list Plugin allows you to easily print invoices, single order packing lists, and multi-order pick lists for orders right from the orders listing Page. You can print individual orders, or bulk print invoices, packing, or pick lists with a couple clicks. This is a very useful timesaver to help you package and ship orders, and it lets you include invoices with policies in your shipments.
With this Plugin you can also customize the info that gets printed on the invoice / packing list. You can set custom company details, custom info which can include for example returns policy, custom footer content, and more.
Setup and Configuration #
The main Plugin settings tab has sections for appearance, invoice, and packing list settings, and will also allow you to customize your invoice Template. This can be accessed from WooCommerce > Settings > Invoices/Packing Lists.
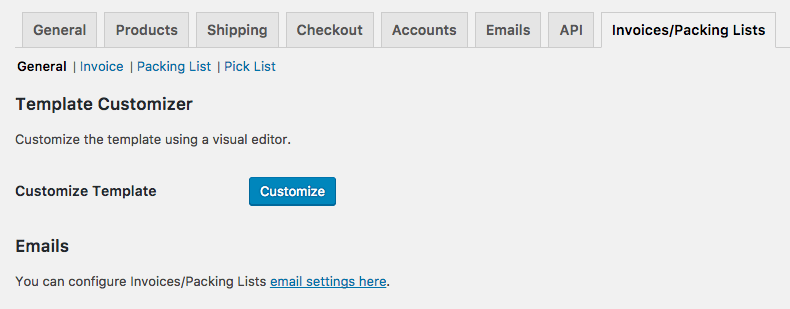
General Settings: Customize the Template #
If you go to WooCommerce > Settings > Invoices/Packing Lists > General, you’ll be able to customize the way your documents appear to customers. Click the “Customize” button to be taken to the WordPress Customizer, which will give you a live preview of your document settings as you adjust them.
Within the Customizer, you can adjust document appearance settings on the left hand side of your screen, and you’ll see these changes reflected in the sample invoice on the right.

There are 5 sets of options you can customize here.
Company Information #
- Shop Logo – Your custom Logo to use on all documents. Leave blank if you do not want to use a Logo, and the shop name will be printed instead.
- Logo max width – Set the maximum display width for the Logo in your invoices, packing lists, and pick lists.
- Shop name – Enter the company name you’d like printed on documents (only used if the Logo is not set). Leave this blank to use the default Site Title on the invoice.
- Shop URL – Enter the URL for your store, which will be the link used for the Logo or shop name. Leave this blank to use the default Site URL.
- Extra information – Enter extra information you’d like to display under company name (For example, VAT information). Leave this blank if you do not want to display additional information.
- Shop name or Logo alignment – Select where the Logo or shop name should be aligned in the document header.
- Shop address – Enter your shop address information to be displayed in the document header. Leave this blank if you do not want to display a shop address.
- Shop address alignment – Select where the shop address should be aligned in the document header.
Typography #
- Body font size – Select the size of the document’s body text.
- Heading font size – Select the size of the document’s heading text.
Colors #
- Link Color – Select the color of links in the documents’ body text.
- Headings color – Select the color of the document’s heading text.
- Table Head Background color – Select the background color of the document’s table heading.
- Table Head color – Select the color of the document’s table heading text.
Content #
- Heading – Enter additional text or information to display below the customer’s address details and above the order items table. Leave this blank if you do not want to display additional header text.
- Return Policy, Terms & Conditions, etc – Enter your return policy or terms to display below the order items table and above the footer. Leave this blank if you do not want to display terms or return policy text.
- Fine print – Select this to print the return policy / terms & conditions text in a small font.
- Footer – Enter additional text or information to display at the bottom of the document. Leave this blank if you do not want to display additional footer text.
Advanced #
- Custom Styles – Enter any custom CSS you’d like to apply to your documents. If you want your CSS to be document-specific, you can use the CSS class that wraps each document:
.WooCommerce-pip.invoice { // invoice-specific CSS }.WooCommerce-pip.packing-list { // packing list-specific CSS }.WooCommerce-pip.pick-list { // pick list-specific CSS }
Invoice Settings #
You can configure the following settings under WooCommerce > Settings > Invoices/Packing Lists > Invoices:

- Show shipping method – Select this if you want your invoices to show the shipping method next to the customer addresses.
- Show customer details – Select this if you want your invoices to show the customer’s basic WooCommerce account details below the order items table.
- Show customer note – Select this if you want your invoices to show any customer notes below the order items table.
- Show Coupons used in order – Select this if you want your invoices to show any coupon codes used directly below the order items table.
Invoice Number Generation #
You can use two methods to generate invoice numbers: use the order number as the invoice number, or generate a sequential invoice number that’s independent of the order number.

- Use Order Number as Invoice Number – Select this if you want to use order numbers as the invoice number on all invoices.
- Invoice Number Start – (shown if order numbers are not used) Select a starting number for your invoice counter. The first printed invoice will use this invoice number, then invoice numbers will be sequential from this number.
- Reset counter – (shown if order numbers are not used) Select this if you want to reset the starting invoice number. Note that doing this may cause duplicate invoice numbers, as existing invoice numbers are never changed.
- Invoice Number Minimum Digits – (shown if order numbers are not used) Enter the minimum number of digits your invoice numbers should have — if the number of digits is greater than the digits in your invoice number, leading zeroes will be used as Padding. For example, if my starting invoice number is
100and I set a minimum of 5 digits, my first invoice number will be printed as00100. - Invoice Number Prefix – Enter a prefix to add before the invoice number if desired (works with both order number and invoice number formats). You may use any of the placeholders included in the settings Page as well (ie
{YY}-). Leave this blank to disable prefixes. - Invoice Number Suffix – Enter a suffix to add after the invoice number if desired (works with both order number and invoice number formats). You may use any of the placeholders included in the settings Page (ie
-{YY}). Leave this blank to disable suffixes.

Prefix / Suffix Merge Tags
The following placeholders / merge Tags can be used in invoice number prefixes and suffixes. They are not required, as plain text can be used as well.
Merge Tags for time will insert the time when the invoice is generated.
| MERGE TAG | EXPANDS TO |
|---|---|
{D} | Day of the month without leading zeros |
{DD} | Day of the month with leading zeros (2 digits) |
{M} | Month, without leading zeros |
{MM} | Month, with leading zeros (2 digits) |
{YY} | Year (2 digits) |
{YYYY} | Year (4 digits) |
{H} | 24-hour format of an hour without leading zeros |
{HH} | 24-hour format of an hour with leading zeros (2 digits) |
{N} | Minutes with leading zeros |
{S} | Seconds with leading zeros |
Packing List Settings #
You can configure the following settings under WooCommerce > Settings > Invoices/Packing Lists > Packing Lists:
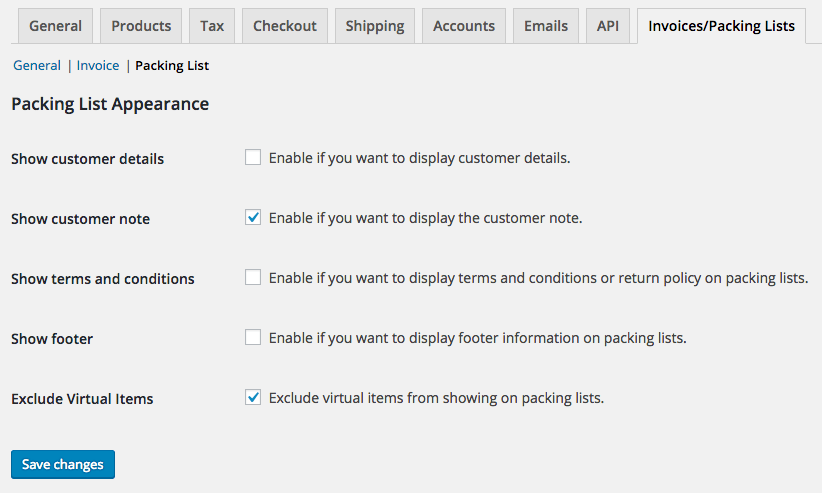
- Show customer details – Select this to show the customer’s basic WooCommerce account details below the order items table in packing lists.
- Show customer note – Select this to show any customer notes below the order items table in packing lists.
- Show terms and conditions – Select this to show your terms and conditions from invoices on the packing list.
- Show footer – Select this to show the footer text from invoices on packing lists.
- Exclude virtual items – Select this if you want to hide WooCommerce Products marked as “virtual” (not shipped) from your packing lists.
Pick List Settings #
You can configure the following settings under WooCommerce > Settings > Invoices/Packing Lists > Pick Lists:
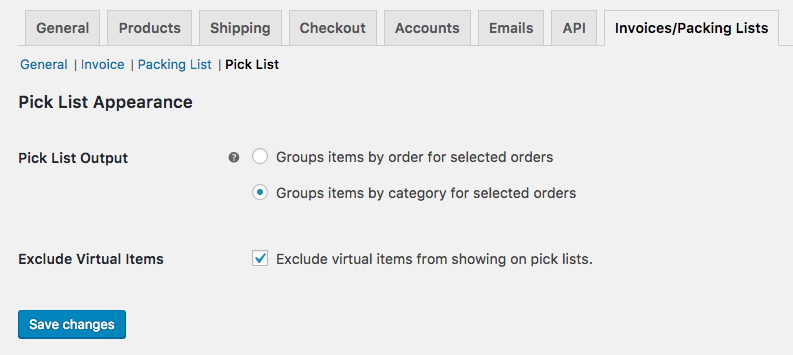
- Pick List Output – Select the output of the combined pick list — whether items should be grouped by order, or grouped by Categories
- Exclude virtual items – Select this if you want to hide WooCommerce Products marked as “virtual” (not shipped) from your packing lists and combined pick lists.
Email Settings #
WooCommerce Print Invoices / Packing Lists adds three new emails to your WooCommerce store, which can be accessed under WooCommerce > Emails:

- Invoice – If invoice emails are enabled, an HTML invoice will be sent to your customers once an order has been paid for. The content of the email is the same as a printed invoice.
- Packing List – If packing list emails are enabled, an HTML packing list document will be emailed to store admins (or a list of comma-separated recipients) for each order once it’s paid for. You can send this email to multiple recipients (for example, your warehouse managers).
- Pick List – Pick list emails are only sent manually via bulk actions. If one or more orders are selected from the “Orders” list, a combined HTML pick list will be sent via email to the recipients.
To edit any of these emails (enable / disable or adjust subject lines and recipients), you can click the email name from this table.

Single and Bulk Order Actions #
You can print and email invoices, packing lists, and pick lists with several different order actions.
Single Order Actions #
When viewing your “Orders” list, a new “documents” action icon is added to your Order Actions column with the “document” icon.
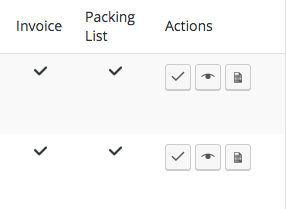
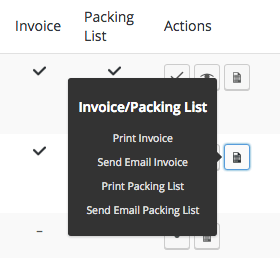
When clicked, this icon will show you all possible document actions (printing and emailing) for that order:
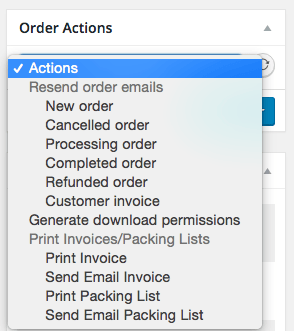
When viewing or editing an order, you can also access order actions within the “Order Actions” dropdown. To use an order action here, select the action and click the “Apply” (arrow) icon.
Bulk Order Actions #
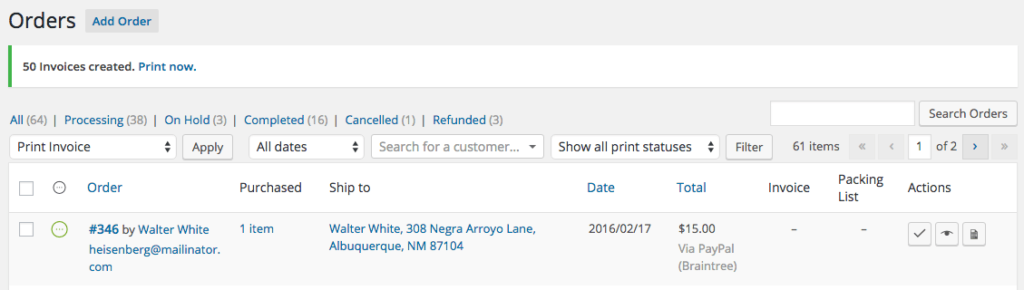
First, before performing bulk actions, it may be helpful to filter your orders based on whether an invoice or packing list has been printed or not. You can do so from the main “Orders” list by selecting your filter and clicking “Apply”.

Filtering by order status may also be helpful, as bulk actions will print or email whatever orders you select and will not make choices for you on which statuses should be included.
Once you’ve selected the orders you want to print or email, you can use one of several bulk actions to apply to these orders:
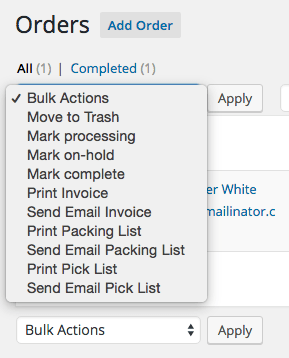
- Print Invoice – Generates a document with printable HTML invoices for all selected orders (Page breaks between each order’s invoice). This can be opened, previewed, and printed.
- Send Email Invoice – Send an email with the HTML invoice content for all selected orders to the order’s billing email.
- Print Packing List – Generates a document with printable HTML packing lists for all selected orders (Page breaks between each order’s packing list). Items in the packing list will be sorted by product category. This can be opened, previewed, and printed.
- Send Email Packing List – Sends an email with the HTML packing list content for each of the selected orders to admin recipients configured in your email settings. If 20 orders are selected, you will receive 20 packing list emails.
- Print Pick List – Generates a document with a combined, printable HTML pick list for all selected orders. This list is a “master” combined pick list for all selected orders, and Products in each order are grouped by product category. This can be opened, previewed, and printed.
- Send Email Pick List – Sends an email with the HTML pick list content for all of the selected orders to admin recipients configured in your email settings. If 20 orders are selected, only one email is sent, and the content contains a combined list for all 20 orders.
You can view samples of each document below.
Once you’ve chosen and applied your bulk action, your orders list will refresh and a success notice will be displayed. If you choose a “print” bulk action, you’ll see a link to open your document(s) in a new window for printing. Click the link to preview and print your document(s).